Acoustic Panel Installation Guide: A Step-by-Step Guide to Better Sound
Introduction
Acoustic panels are a great way to improve sound quality in any room, from home theaters to recording studios. However, installing acoustic panels can be a daunting task, especially for those who are new to DIY projects. In this comprehensive guide, we will walk you through the process of installing acoustic panels, from preparation to completion.Preparation is Key
Before you start installing acoustic panels, make sure you have all the necessary tools and materials. This includes:Step 1: Measure and Mark the Wall
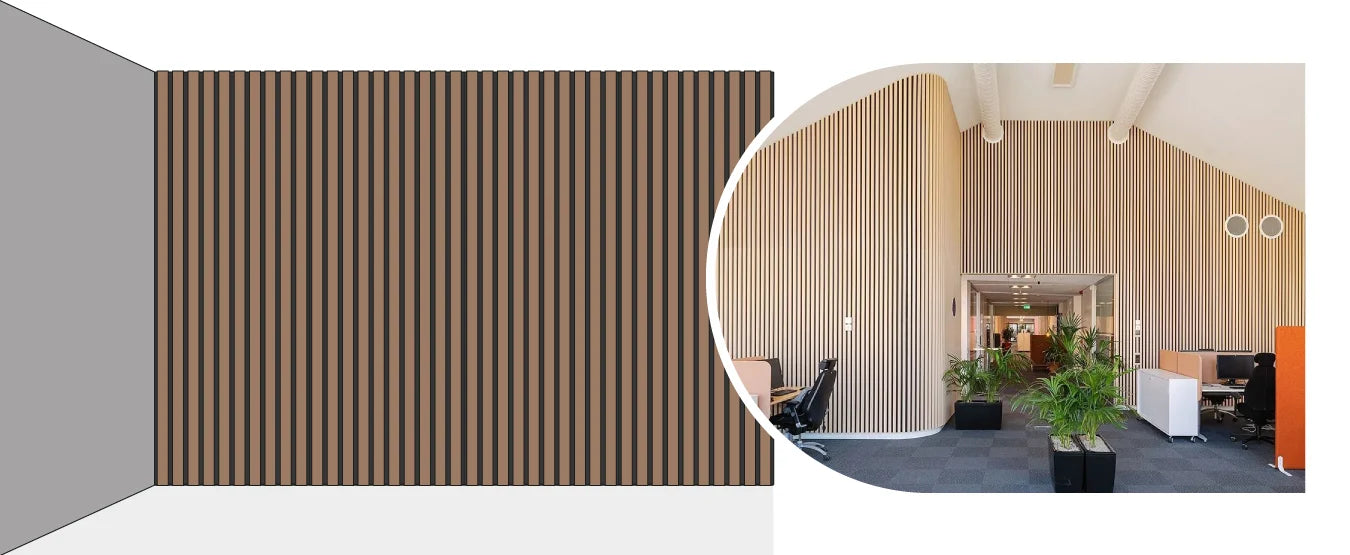
As we can see from the illustration, Acoustic Panel Installation Guide has many fascinating aspects to explore.
The first step in installing acoustic panels is to measure and mark the wall where the panels will be installed. Use a level to ensure that the marks are straight and level. This will help you to ensure that the panels are installed correctly and that the sound quality is improved.Step 2: Drill Pilot Holes
Using a drill, create pilot holes for the fasteners that will hold the panels in place. Make sure the holes are spaced evenly and that the fasteners are the correct size for the panels.Step 3: Install the Panels
Once the pilot holes are drilled, it's time to install the acoustic panels. Use the fasteners to attach the panels to the wall, making sure they are securely in place.Step 4: Secure the Panels

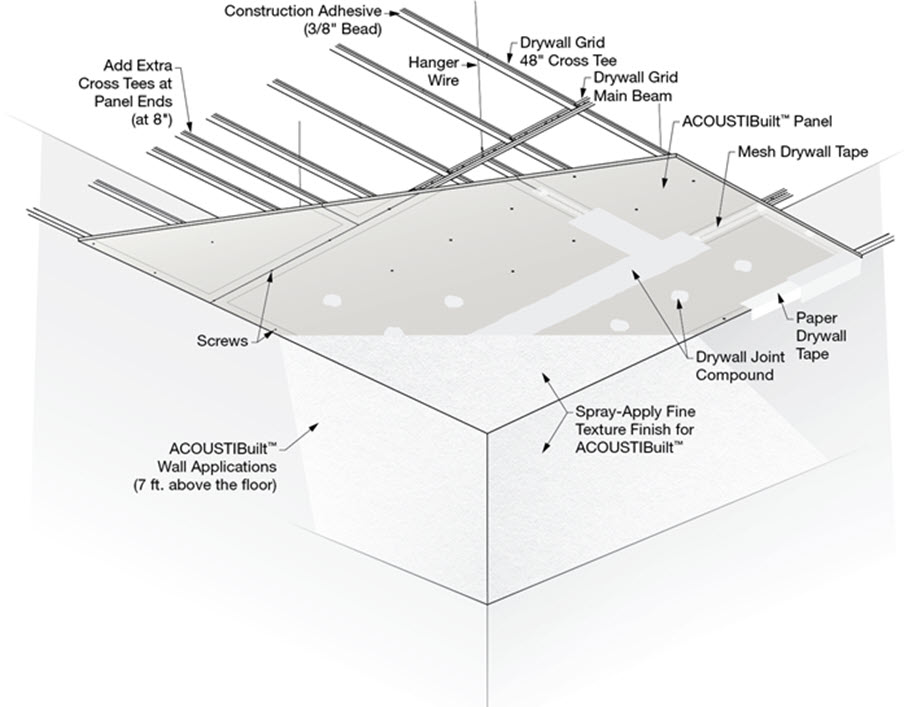
As we can see from the illustration, Acoustic Panel Installation Guide has many fascinating aspects to explore.
To ensure that the panels are securely in place, use adhesives to bond the panels to the wall. This will help to prevent the panels from falling or shifting over time.Step 5: Add Additional Panels (Optional)
If you want to add additional acoustic panels to your installation, now is the time to do it. Make sure to follow the same steps as before, measuring and marking the wall, drilling pilot holes, and installing the panels.Common Mistakes to Avoid
When installing acoustic panels, there are several common mistakes to avoid. These include:- Not measuring the wall correctly, leading to uneven panel installation
- Not using the correct fasteners or adhesives, leading to panel instability
- Not allowing the panels to acclimatize to the room environment, leading to poor sound quality
Such details provide a deeper understanding and appreciation for Acoustic Panel Installation Guide.
Additional Tips and Considerations
In addition to the steps outlined above, there are several additional tips and considerations to keep in mind when installing acoustic panels. These include:- Using the correct type of acoustic panel for your specific application
- Considering the aesthetic impact of the panels on the room
- Ensuring that the panels are installed in a way that allows for easy maintenance and repair
Conclusion
Installing acoustic panels is a straightforward process that can be completed with the right tools and materials. By following the steps outlined in this guide, you can improve sound quality in any room and create a more enjoyable listening experience. Remember to avoid common mistakes and consider the additional tips and considerations outlined above. With practice and patience, you'll be installing acoustic panels like a pro in no time.References
For more information on acoustic panels and installation, check out the following resources:- Armstrong World Industries: "Acoustic Panels Installation Guide"
- USG Corporation: "Acoustic Panels Installation Instructions"
- CertainTeed: "Acoustic Panels Installation Guide"


.png "How to install wall panels - full step by step guide from our experts")

 - Smart ...")


