Embracing the Minimalist Aesthetic: A DIY Furniture Update Tutorial
As we continue to navigate the world of modern design, it's no secret that the minimalist aesthetic has taken center stage. Simple, clean lines, and a focus on functionality have become the hallmarks of a beautifully designed space. But what happens when you want to update your existing furniture to fit this new aesthetic, without breaking the bank?
A Guide to the Minimalist Furniture Update DIY Project Tutorial
The good news is that updating your furniture to fit a minimalist aesthetic doesn't have to be expensive or complex. With a few simple DIY projects, you can give your old pieces a fresh new look that's sure to impress. In this article, we'll walk you through the process of creating a minimalist furniture update DIY project tutorial, from start to finish.
Step 1: Assess Your Space and Choose Your Pieces

Before you begin, take some time to assess your space and decide which pieces of furniture need a refresh. Consider your lifestyle, your personal style, and the overall aesthetic you want to achieve. From there, choose the pieces that will get the most attention and are most critical to achieving your goals.
Step 2: Gather Your Materials and Tools
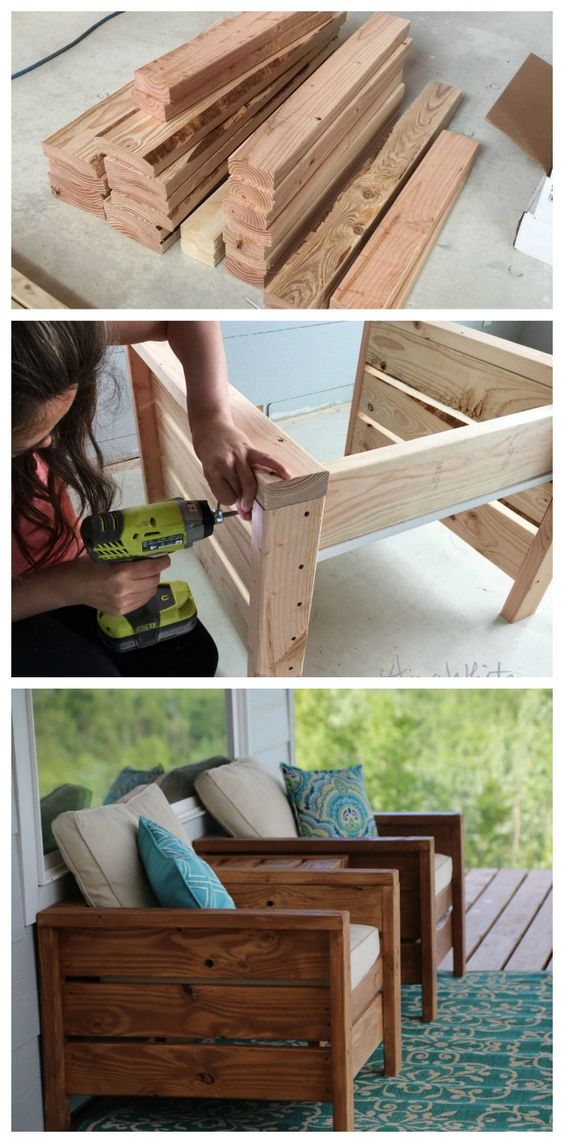
Once you've selected your pieces, it's time to gather your materials and tools. For a minimalist furniture update, you'll want to keep things simple and budget-friendly. Consider using reclaimed wood, metal, or glass for a sleek, modern look. You'll also need a variety of tools, including a drill press, saw, and sander.
Before you start making any changes, take some time to measure and plan your design. Use a tape measure to take precise measurements of your furniture pieces, and create a detailed plan for how you want to transform them. Consider sketching out your ideas and making mockups before you begin.

Such details provide a deeper understanding and appreciation for Minimalist Furniture Update Diy Project Tutorial.
Step 4: Update Your Furniture with a Fresh Coat of Paint
One of the easiest ways to give your furniture a fresh new look is to update the finish. Use a non-Toxic paint that's specifically designed for furniture, and follow the manufacturer's instructions for application and drying times. For a minimalist look, consider using a single color throughout, or a subtle ombre effect.
Finally, add a touch of metallic accent to give your updated furniture a pop of personality. Use materials like stainless steel, copper, or bronze to add hardware, handles, or decorative trim to your pieces.
Conclusion
Such details provide a deeper understanding and appreciation for Minimalist Furniture Update Diy Project Tutorial.
Updating your furniture to fit a minimalist aesthetic can be a fun and rewarding DIY project. With these simple steps, you can give your existing pieces a fresh new look that's sure to impress. Remember to keep things simple, focus on functionality, and have fun with the process!
Minimalist Furniture Update DIY Project Tutorial Key Takeaways:
- Assess your space and choose the pieces that need a refresh.
- Keep things simple and budget-friendly with materials like reclaimed wood, metal, or glass.
- Measure and plan your design carefully before making any changes.
- Use a fresh coat of non-Toxic paint to update the finish.
- Add storage and organization with materials like metal, glass, or reclaimed wood.
- Finish with a touch of metallic accent for a pop of personality.
- DIY Open Shelves for Organized Kitchen Space
- DIY Floating Shelves for Smart Storage
- DIY Minimalist Wall Art
- Upcycled Furniture Makeovers
- DIY Lighting Fixtures for a Cozy Ambiance


")

")


:max_bytes(150000):strip_icc()/SFinteriors-27-c01c7c29bea14f859c0f2093ca2092bc.jpg "HomeMade Modern")


:max_bytes(150000):strip_icc()/2019-07-27Rugbyst7035-38dc64bde6654f01a019aa62c2c44531.jpg "25+ Mind-Blowing DIY Minimalist Decor Hacks You Need Now")


